Android ボタン
ホーム


いよいよ、実際のプログラミングをはじめます。
まずは、はじめにボタンを使ってみます。ボタンはUIにとって重要なパーツです。
プロジェクトの作成
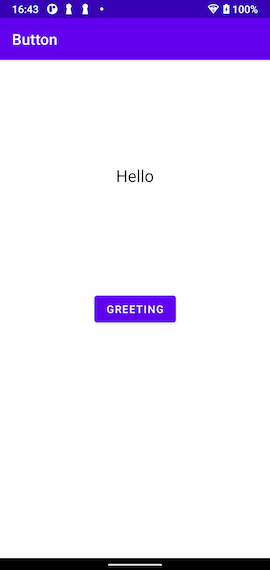
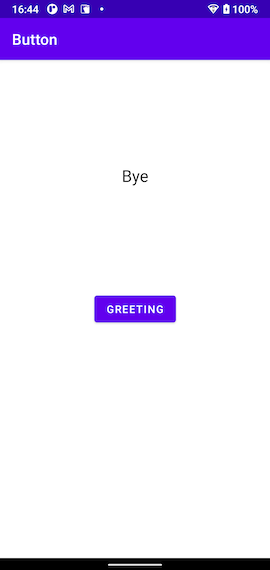
Greeting というボタンをタップすると、Hello と Bye という文字列が入れ替わるアプリ を作ります。Empty Activity テンプレートを使って Button というプロジェクトを 作ってください。
コーディング
Androidプログラミングで UI パーツを特定するための新しい方法の View Binding を有効にするために、Gradle Scriptsフォルダの build.gradle (Module: Button.app) の android グループに viewBinding 項目を追加します。
なお、dependencies グループの testImplementation ‘junit:junit:4.+’ 項目を削除すると 警告が消えるみたいです。
build.gradle (Module: Button.app)
android {
    ・・・
    viewBinding {
        enabled = true
    }
}

dependencies {
    ・・・
    }
次に、app/res/values の中の strings.xml にアプリケーションで使われる文字列を登録します。
strings.xml
<resources>
    <string name="app_name">Button</string>
    <string name="hello">Hello</string>
    <string name="bye">Bye</string>
    <string name="greeting">Greeting</string>
</resources>
そして、app/res/layout の中の activity_main.xml に画面表示の設定をします。
activity_main.xml
<?xml version="1.0" encoding="utf-8"?>
<androidx.constraintlayout.widget.ConstraintLayout
    xmlns:android="http://schemas.android.com/apk/res/android"
    xmlns:app="http://schemas.android.com/apk/res-auto"
    xmlns:tools="http://schemas.android.com/tools"
    android:layout_width="match_parent"
    android:layout_height="match_parent"
    tools:context=".MainActivity">

    <TextView
        android:id="@+id/textview"
        android:layout_width="wrap_content"
        android:layout_height="wrap_content"
        android:text="@string/hello"
        android:textAppearance="@style/TextAppearance.AppCompat.Large"
        app:layout_constraintBottom_toTopOf="@+id/button"
        app:layout_constraintEnd_toEndOf="parent"
        app:layout_constraintStart_toStartOf="parent"
        app:layout_constraintTop_toTopOf="parent" />

    <Button
        android:id="@+id/button"
        android:layout_width="wrap_content"
        android:layout_height="wrap_content"
        android:text="@string/greeting"
        app:layout_constraintBottom_toBottomOf="parent"
        app:layout_constraintEnd_toEndOf="parent"
        app:layout_constraintStart_toStartOf="parent"
        app:layout_constraintTop_toTopOf="parent" />

</androidx.constraintlayout.widget.ConstraintLayout>
最後に、app/java/com.example.button の中の MainActivity.kt にアプリケーションの処理を記述します。
MainActivity.kt
package com.example.button

import androidx.appcompat.app.AppCompatActivity
import android.os.Bundle
import com.example.button.databinding.ActivityMainBinding

class MainActivity : AppCompatActivity() {
    private lateinit var binding: ActivityMainBinding
    override fun onCreate(savedInstanceState: Bundle?) {
        super.onCreate(savedInstanceState)
        binding = ActivityMainBinding.inflate(layoutInflater)
        setContentView(binding.root)

        val textview = binding.textview
        val button = binding.button
        button.setOnClickListener  {
            if (textview.text == "Hello") {
                textview.text = getString(R.string.bye)
            } else {
                textview.text = getString(R.string.hello)
            }
        }
    }
}
実行結果


28955 visits
Posted: Oct. 06, 2021
Update: Dec. 07, 2021