macOS SwiftUIプログラミング Doument App 2 (ImageViewer)
【お知らせ】
SwiftUIで作った macOS Todo アプリ
ToDone
を100ダウンロードまで無料にしました。マニュアルページは、ToDone サポートページ です。
【本文】
Xcode で macOS の Document App テンプレートを使って画像ビューワを作って見ようと思っています。前回のテキストエディタと違い、今回は難しいだろうなと思っています。
私の開発環境は次のとおりです。
- MacBook Air 2018年モデル、メモリ8G
- macOS Monterey 12.4
- Xcode 13.4.1
- Swift 5.6.1
更新履歴
2022/07/24 Xcode での Info.plist の設定を追加しました。
2022/07/25 コード説明をつけました。まだまだ雑ですが、徐々に改訂していこうと思っています。
2022/07/26 コード説明を少し改訂しました。
Document App
Document App テンプレートは、ドキュメント・ベースド・アプリケーション(Document-Based Application)を作るテンプレートです。
ドキュメント・ベースド・アプリケーションとは、 内容の違う複数のデータ(ドキュメント)を同時に開くことのできるアプリケーションです。それぞれぞれのデータは編集することもでき、保存することもできます。また新規にデータ(ドキュメント)を作ることもできます。開くデータの場所や、新規データの保存場所は SandBox にとらわれることがなく、お使いのマックの自由な場所に保存できます。
プロジェクトの作成
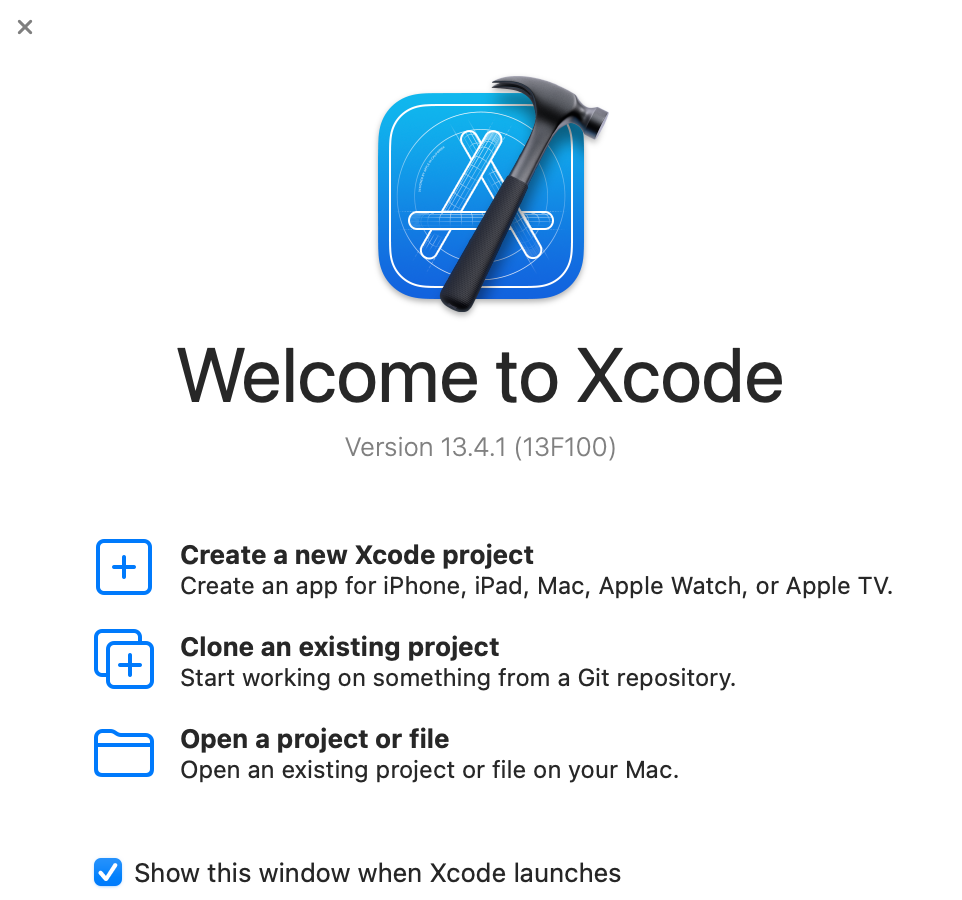
Xdoeを起動して表示される Welcome to Xcode 画面で Create a new Xcode Project をクリックするか、File メニュー → New → Project... を選びます。
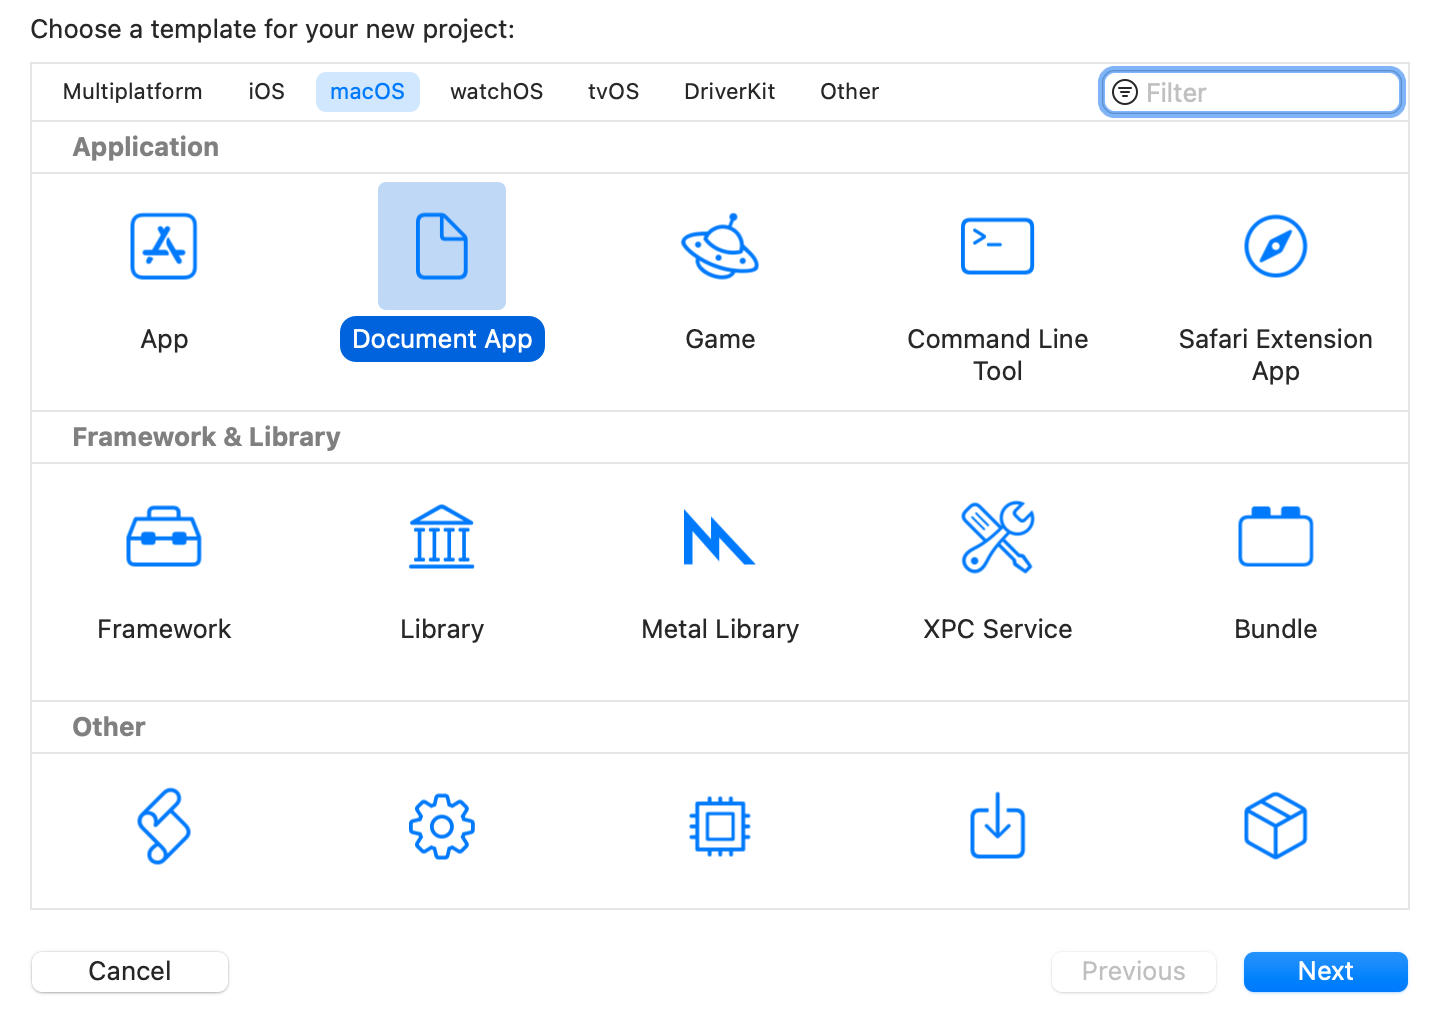
次の画面で macOS の Document App テンプレートを選び Next をクリックします。
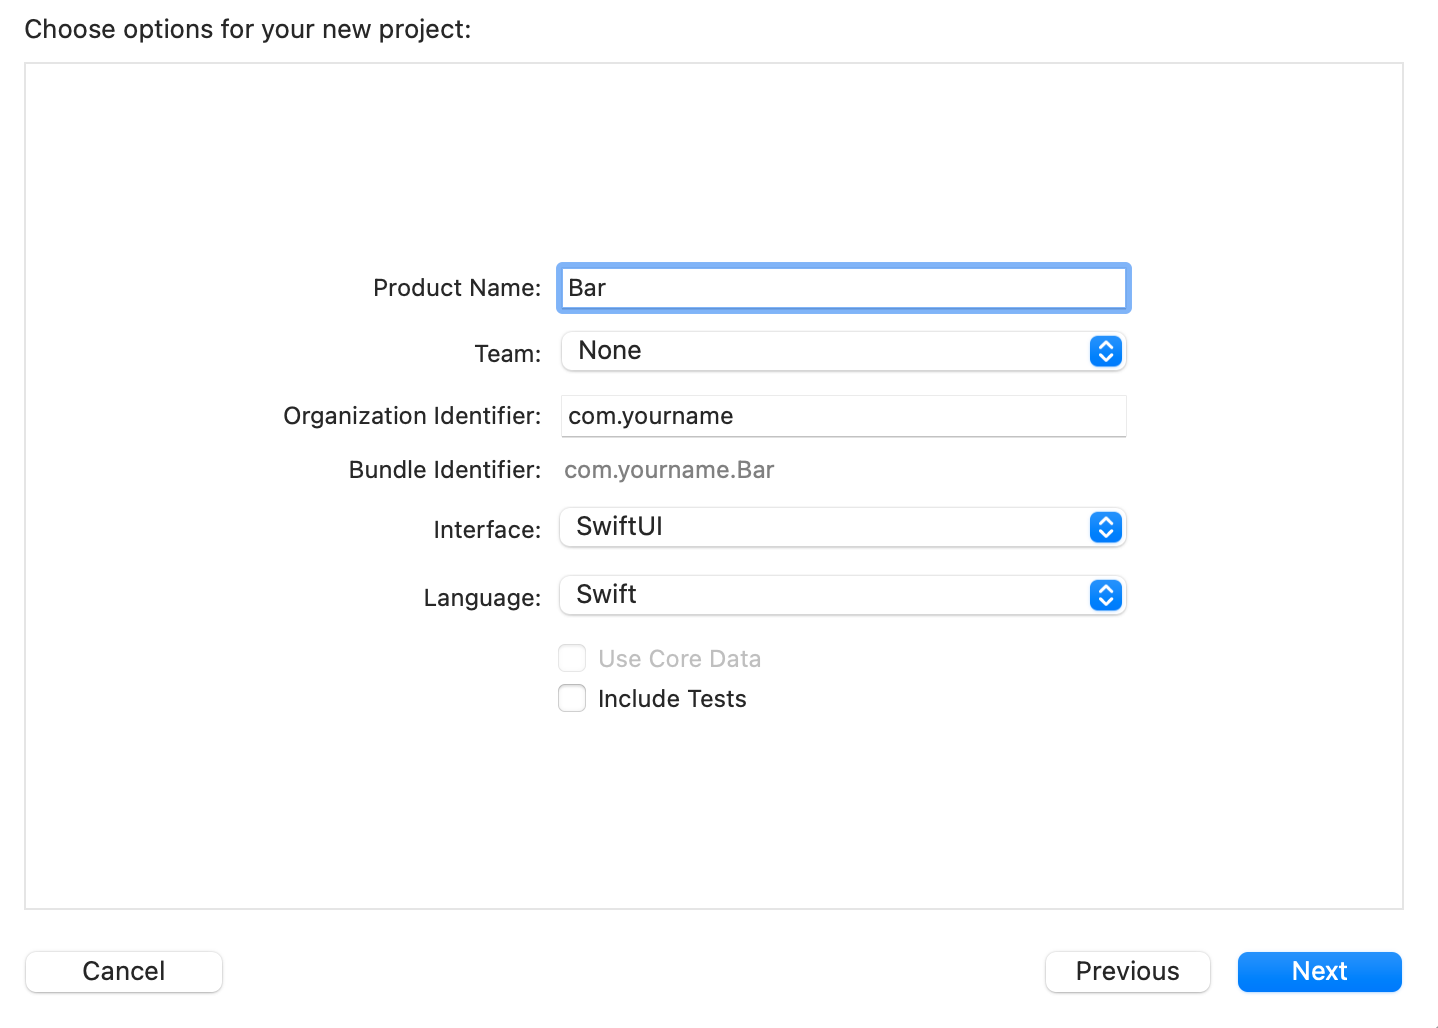
次の画面で次のように設定して Next をクリックします。
- Product Name は任意の名前にします。
- Team は Apple Developer に登録している名前にしますが、 登録していない場合は、None を選びます。
- Organization Identifier は、お持ちの URL を逆にしたものを設定しますが、 URL をお持ちでない場合は、com.yourname などにしておきます。
- Interface に SwiftUI を選びます。
- Language に Swift を選びます。
- Use Core Data のチェックを外します(Core Data はもともとチェックできない状態になっています)。
- Include Tests のチェックを外します。
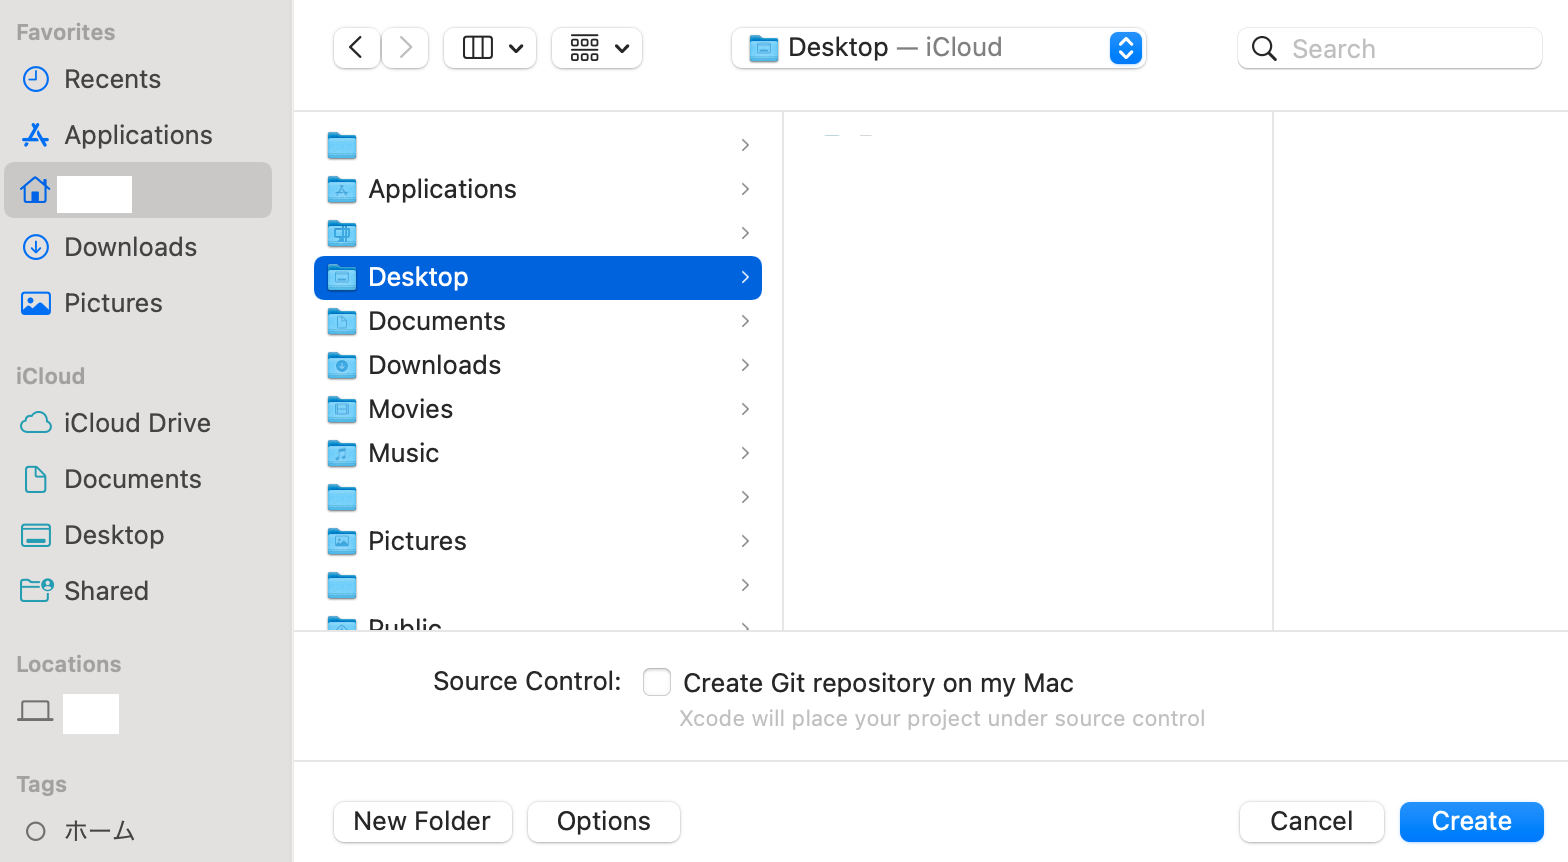
次の画面で保存場所を決めて、Create をクリックします。 私の場合は、Create Git repository on may Mac のチェックは外しています。
コーディング
BarApp.swift
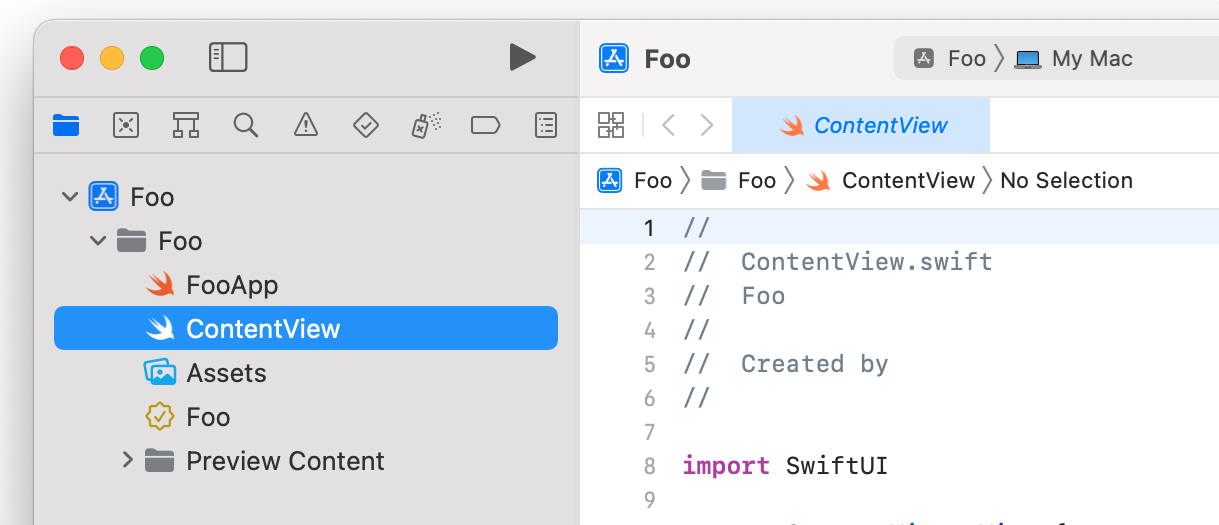
Xcode では、プロダクト名App.swift です。
import SwiftUI

@main
struct BarApp: App {
    var body: some Scene {
        DocumentGroup(viewing: BarDocument.self) { file in
            ContentView(document: file.$document)
        }
    }
}
コード説明
- DocumentGroup(viewing: BarDocument.self)
Scene に DocumentGroup を宣言することにより、macOS では複数のドキュメントを開く機能と、それに合わせたメニューが表示されるようになります。引数には newDocument と viewing があり、前者はドキュメントの閲覧と編集(read, write)が可能で、後者はドキュメントの閲覧(read)だけが可能です。閲覧と編集ができるようにする場合は次のように書き換えます。
DocumentGroup(newDocument: BarDocument()) {
            ContentView(document: $0.$document)
}
// もしくは、
DocumentGroup(newDocument: BarDocument()) { file in
            ContentView(document: file.$document)
}
BarDoc.swift
Xcode では、プロダクト名Document.swift です。
import SwiftUI
import UniformTypeIdentifiers

struct BarDocument: FileDocument {
    var image: NSImage

    /*
    init(image: NSImage = NSImage()) {
        self.image = image
    }
    */

    static var readableContentTypes: [UTType] { [
        UTType(importedAs: "public.png"),
        UTType(importedAs: "public.jpeg")
    ] }

    init(configuration: ReadConfiguration) throws {
        guard let data = configuration.file.regularFileContents,
              let image = NSImage(data: data)
        else {
            throw CocoaError(.fileReadCorruptFile)
        }
        self.image = image
    }

    func fileWrapper(configuration: WriteConfiguration) throws -> FileWrapper {
        throw CocoaError(.fileWriteUnknown)
    }
}
コード説明
- import UniformTypeIdentifiers
Apple では、ファイルの形式(フォーマット)を UniformTypeIdentifiers(UTI)で設定します。ここでは、すでに定義されているファイル形式(フォーマット)や UTI に関するいろいろな設定を読み込んでいます。 - struct BarDocument: FileDocument {
FileDocument プロトコルを採用した場合に実装しなければいけないのは init(configuration:) と readableContentTypes: と fileWrapper(configuration:) と writableContentTypes: です。init(configuration:)がファイルの読み込みを担当して、readableContentTypes: でドキュメントが開くことができるタイプを設定して、fileWrapper(configuration:)がファイルの保存を担当して、writableContentTypes: がドキュメンが保存できるタイプを設定します。ただし writableContentTypes: は、デフォルト(初期設定?)で実装され、実際に記述しなくても良いみたいです。表にすると次のようになります。
FileDocument プロトコルの必須項目必須項目 役割 init(configuration:) ファイルの読み込みを担当 readableContentTypes: ドキュメントが開くことができるタイプを設定 fileWrapper(configuration:) ファイルの保存を担当 writableContentTypes: ドキュメンが保存できるタイプを設定
※ただしデフォルトで実装されるので、実際の記述は不要 - var image: NSImage
ContentView にデータを渡すためのプロパティを宣言しています。 - init(image: NSImage = NSImage()) { self.image = image }
オープンパネルや「File」メニューからNew Document を選んだ場合に、New Document(新規ドキュメント)に表示される内容を定義します。アプリケーションが閲覧専用に設定されている場合は、この定義をコメントアウトするか削除しても大丈夫です。 - static var readableContentTypes: [UTType] { [
扱えるファイル形式を UTType の配列として設定します。UTType は、ロード、送信、または受信するデータのタイプを表す構造体です。この設定は省略できません。 - UTType(importedAs: "public.png"),
PNG ファイルのための Imported Type(既存のデータタイプ、つまりアプリケーション独自のデータタイプではないもの) としての UTType を作っています。 - UTType(importedAs: "public.jpeg")
JPEG ファイルのための Imported Type(既存のデータタイプ、つまりアプリケーション独自のデータタイプではないもの) としての UTTypeを作っています。 - init(configuration: ReadConfiguration) throws {
ファイルの読み込みを定義します。 - guard let data = configuration.file.regularFileContents,
data 定数にファイルの内容が入ります。 - let image = NSImage(data: data)
data: 引数に前行で取得した data を渡して作った NSImage を image 定数に入れています。 - throw CocoaError(.fileReadCorruptFile)
configuration に失敗した場合のエラー処理です。 - self.image = image
image プロパティに、先ほど作った NSImage を入れています。 - func fileWrapper(configuration: WriteConfiguration) throws -> FileWrapper {
ドキュメントを保存するメソッドです。今回は、閲覧のみのアプリケーションなので、実質何もしない実装に変えます。なお、閲覧専用のアプリでも、FileDocument プロトコルで定義しなければならないメソッドですので、削除することはできません。 - throw CocoaError(.fileWriteUnknown)
fileWrapper の中身です。単にエラーを投げているだけです。
BarView.swift
Xcode では、ContentView.swift です。
import SwiftUI

struct ContentView: View {
    @Binding var document: BarDocument

    var body: some View {
        ScrollView([.horizontal, .vertical]) {
              Image(nsImage: document.image)
        }
    }
}

/*
struct ContentView_Previews: PreviewProvider で始まる、
プレビュー用のコードは削除します。
*/
コード説明
- @Binding var document: BarDocument
プロダクト名Document とバインディングしています。 - ScrollView([.horizontal, .vertical]) {
イメージをスクロールできるようにしています。.horizontal で横方向のスクロールを .vertical で縦方向のスクロールを有効にしています。 - Image(nsImage: document.image)
Image View の nsImage: 引数にバインディングしているプロダクト名Dodument の image プロパティを設定しています。
ビルド
Product メニューの Run をクリックするか、Xcode の左上の右三角 ▶︎ をクリックします。⌘ + R でも OK です。しばらく待つとアプリケーションが起動します。
ドキュメントによっては、Info.plist に Jpeg と Png に対応するための項目を設定しなければならないと書かれていますが、Info.plist に新たな設定を加えなくても動作します。SwiftUI はどんどん進化しているのかもしれませんし、画像の閲覧だけじゃなく、画像に変更を加える場合などは Info.plist の設定も必要なのかもしれません。
Xcode に次のような注意が出ました。
Type "public.png" was expected to be declared and imported in the Info.plist of Bar.app, but it was not found.
タイプ「public.png」は、Bar.appのInfo.plistで宣言およびインポートされることが期待されていましたが、見つかりませんでした。
やっぱり Info.plist の設定もしたほうが良いのですね。
Info.plist
Xcode 上で Info.plist を表示します。初期設定では次のようになっています。
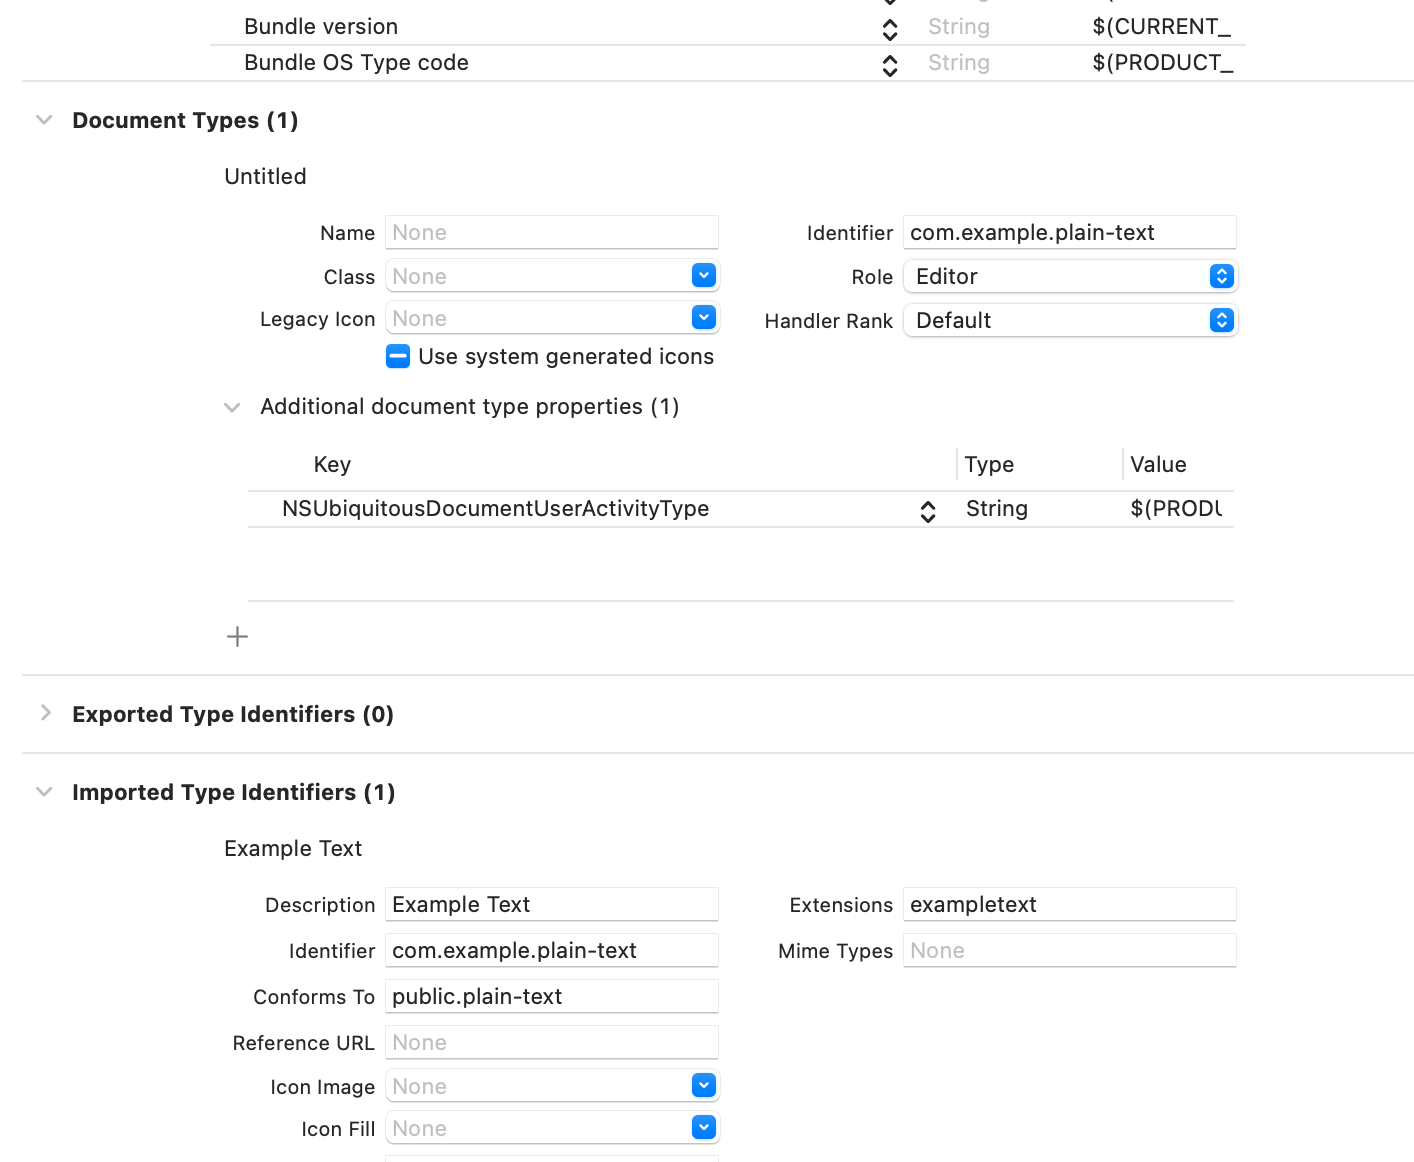
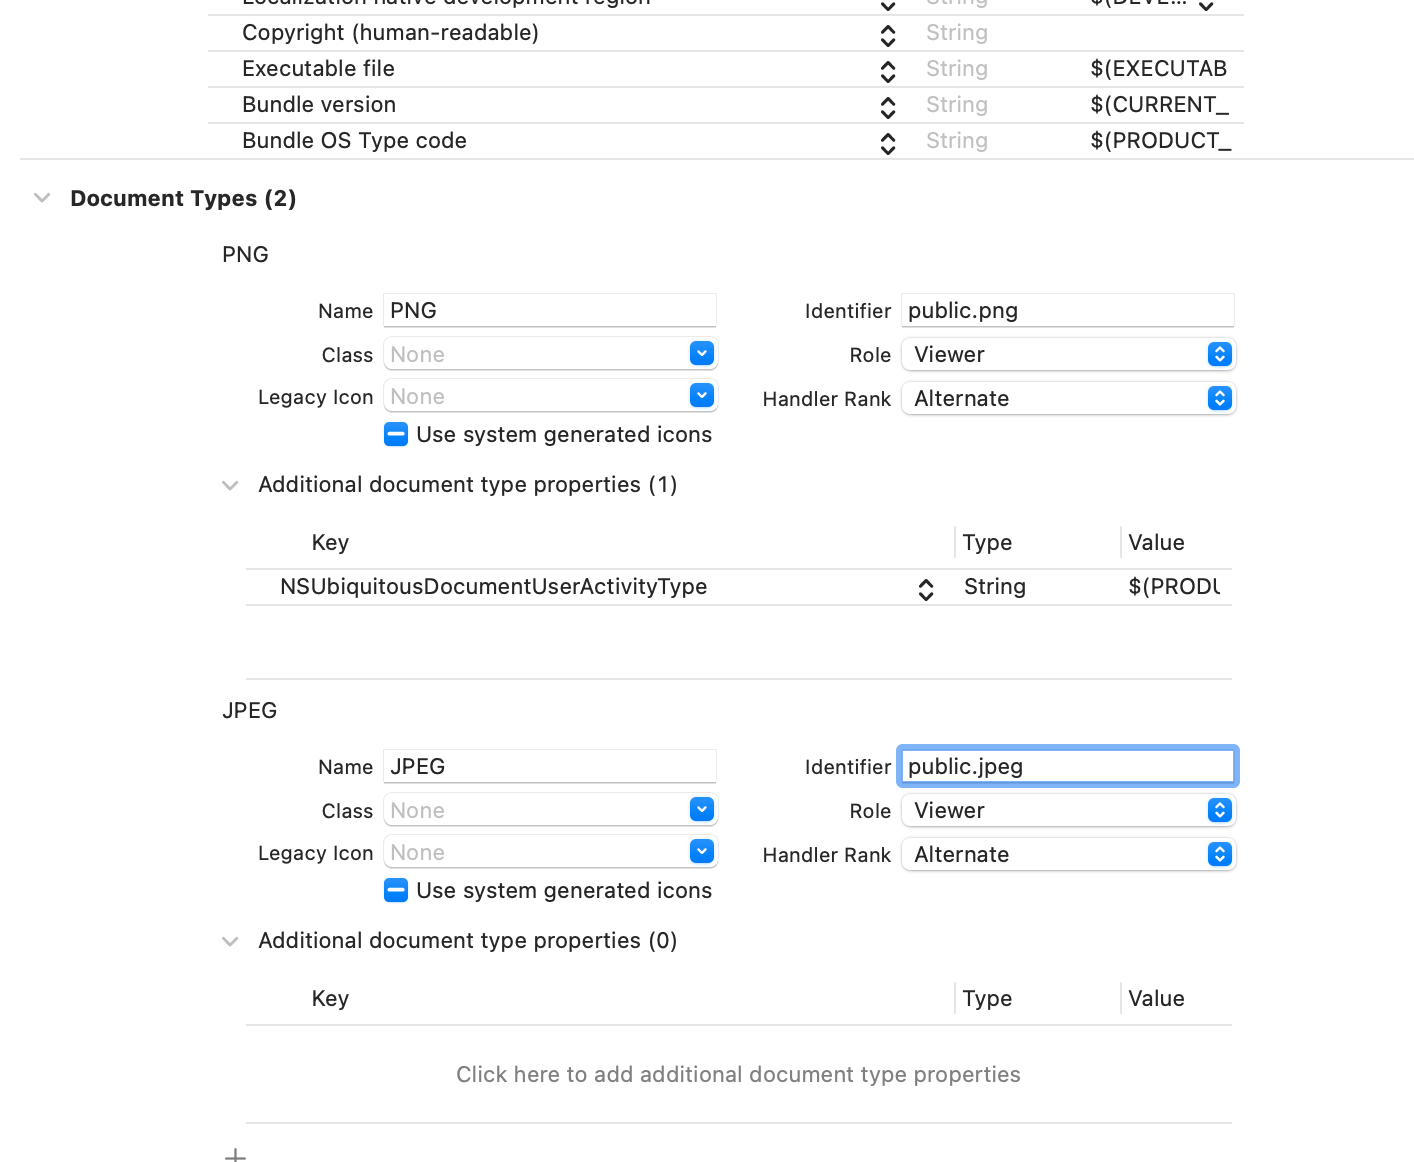
Document Types には、Document App テンプレートを使った場合、デフォルトで com.example.plain-text が書かれていますが、それを書き換えて、さらにもう一つ増やして、合計二つになります。
Exported Type Identifiers は、アプリ独自のタイプを作った場合に設定します。今回は設定しません。Imported Type Identifiers は、既存のタイプを使った場合に設定します。 デフォルトで設定してある Example Text を書き換えて PNG を設定して、もう一つ JPEG を設定して、合計二つ設定します。
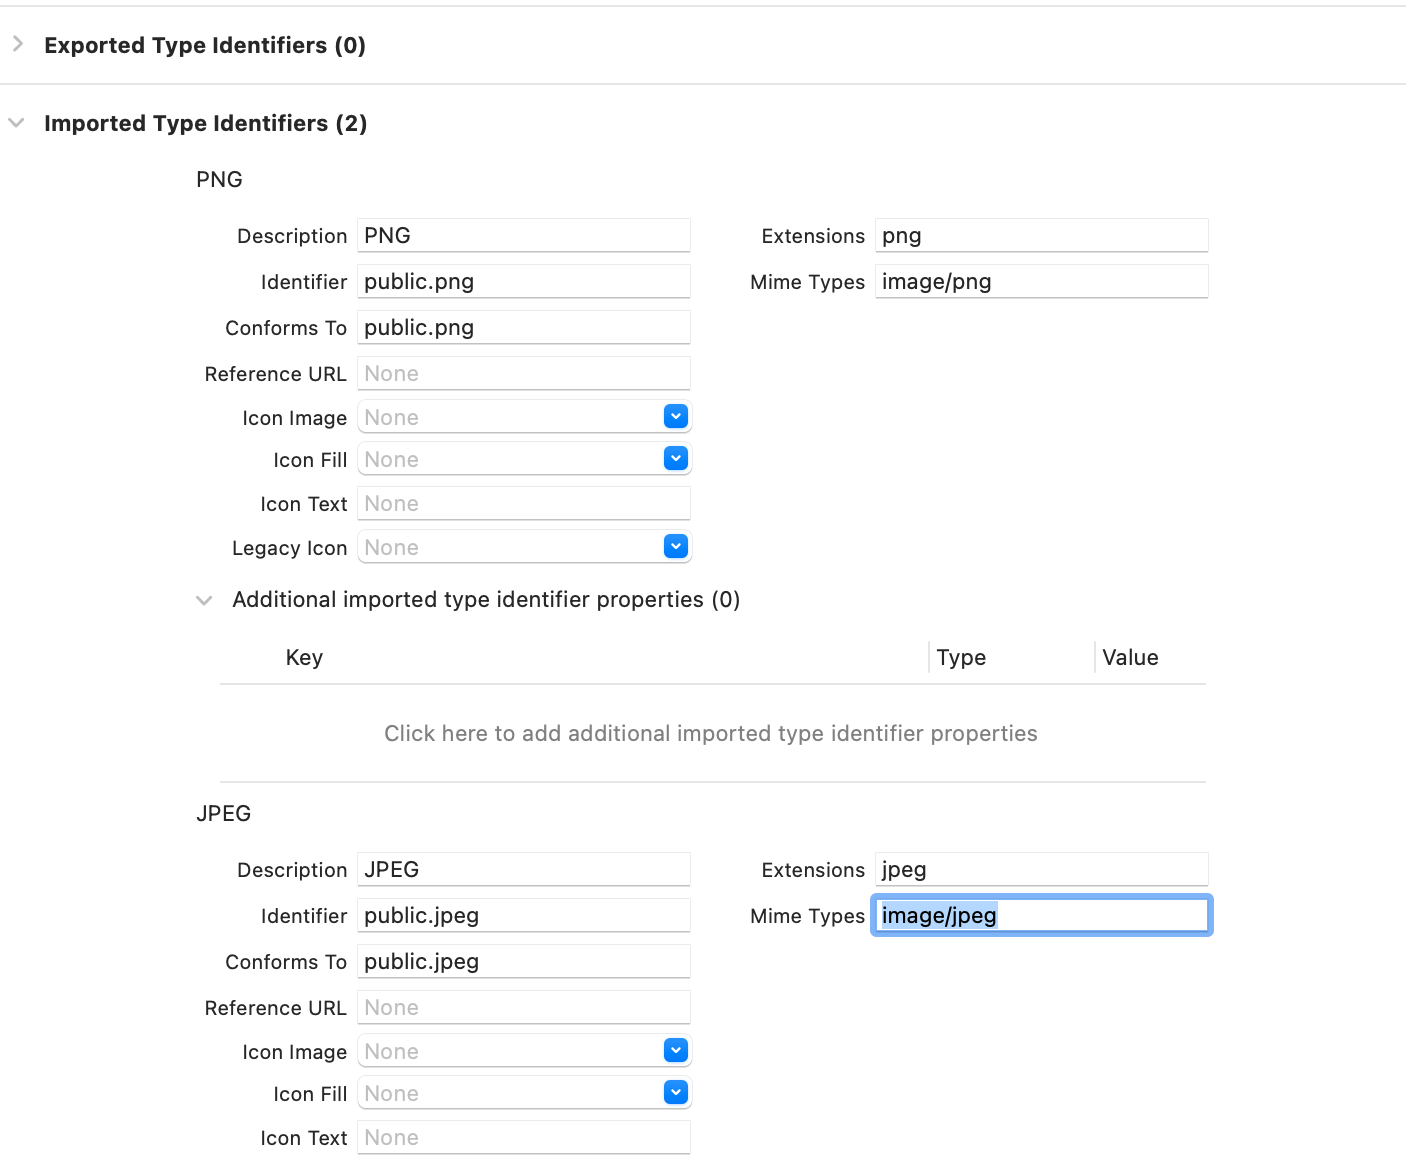
以上で Xcode に表示されていた注意(警告?)が消えます。
ターミナルでビルドする
上記の三つのファイルを任意のテキストエディタで記述してください。ファイル名は一応それなりの名前にしていますが、大文字で始まっていればどんな名前でも OK みたいです。
アプリケーションバンドル
macOS では、アプリケーションを、「アプリケーションバンドル」 とよばれる特殊なフォルダで管理します。アプリケーションバンドルを使うと ダブルクリックでターミナルを開かずにアプリケーションを起動できたり、 アプリケーションにアイコンや画像をつけることができます。
アプリケーションバンドルは次のようなディレクトリ構成になります。
Bar.app
-Contents
--Info.plist
--MacOS
---bar
--Resources
---アイコン.icns
Bar.app/Contents
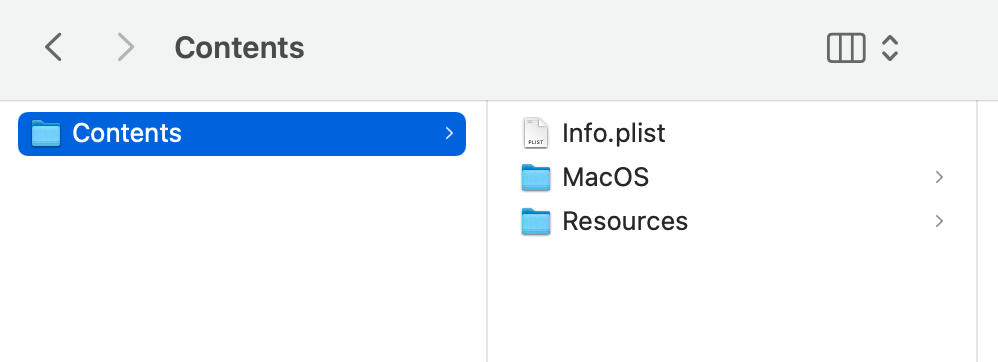
- Bar.app は、通常のフォルダの末尾に .app という拡張子をつけたものです。 〜.app というフォルダは単一のアプリケーションのように表示されます。
- アプリケーションバンドルを右クリックして「パッケージの内容を表示」を選ぶと、 アプリケーションバンドルの中身にアクセスできます。
- Bar.app の直下に Contents というフォルダを作ります。
- Contens フォルダの下に Info.plist というテキストファイルと、MacOS というフォルダと、Resources というフォルダを作ります。
- MacOS フォルダの中に、これから作る bar 実行ファイルを入れます。
- Resources の中に、.icns という拡張子のついたアイコンファイルを入れます。
私は次のサイトから .icns ファイルをダウンロードしました。
フリーアイコンSVG、PNG、ICO、ICNS
Info.plist
<?xml version="1.0" encoding="UTF-8"?>
<!DOCTYPE plist PUBLIC "-//Apple//DTD PLIST 1.0//EN"
"https://www.apple.com/DTDs/PropertyList-1.0.dtd">
<plist version="1.0">
<dict>
	<key>CFBundleExecutable</key>
	<string>bar</string>
	<key>CFBundleIconFile</key>
	<string>icon-macbook.icns</string>
	<key>CFBundleName</key>
	<string>ImageViewer</string>
</dict>
</plist>
Info.plist には、いろいろな設定を書き込めますが、今回は三つだけ設定しました。
- CFBundleExecutable には、実行ファイルを指定します。
- CFBundleIconFile には、.icns 形式のアイコンファイルを指定します。
- CFBundleName には、アプリケーションの名前を指定します。 これを指定しないとアプリケーションバンドルの名前が アプリケーションの名前になります。
Document Types と Imported Type Identifiers に対応した Info.plist
もし、今回の PNG と JPEG に対応した Info.plist を手書きしようとすれば次のようになります。ただし、前述の Info.plist でも問題なく動作します。
<?xml version="1.0" encoding="UTF-8"?>
<!DOCTYPE plist PUBLIC "-//Apple//DTD PLIST 1.0//EN"
"https://www.apple.com/DTDs/PropertyList-1.0.dtd">
<plist version="1.0">
<dict>
	<key>CFBundleDocumentTypes</key>
	<array>
		<dict>
			<key>CFBundleTypeName</key>
			<string>PNG</string>
			<key>CFBundleTypeRole</key>
			<string>Viewer</string>
			<key>LSHandlerRank</key>
			<string>Alternate</string>
			<key>LSItemContentTypes</key>
			<array>
				<string>public.png</string>
			</array>
			<key>NSUbiquitousDocumentUserActivityType</key>
			<string>com.yourname.Bar.example-document</string>
		</dict>
		<dict>
			<key>CFBundleTypeName</key>
			<string>JPEG</string>
			<key>CFBundleTypeRole</key>
			<string>Viewer</string>
			<key>LSHandlerRank</key>
			<string>Alternate</string>
			<key>LSItemContentTypes</key>
			<array>
				<string>public.jpeg</string>
			</array>
		</dict>
	</array>
	<key>CFBundleExecutable</key>
	<string>bar</string>
	<key>CFBundleIconFile</key>
	<string>icon-macbook.icns</string>
	<key>CFBundleName</key>
	<string>ImageViewer</string>
	<key>UTImportedTypeDeclarations</key>
	<array>
		<dict>
			<key>UTTypeConformsTo</key>
			<array>
				<string>public.png</string>
			</array>
			<key>UTTypeDescription</key>
			<string>PNG</string>
			<key>UTTypeIcons</key>
			<dict/>
			<key>UTTypeIdentifier</key>
			<string>public.png</string>
			<key>UTTypeTagSpecification</key>
			<dict>
				<key>public.filename-extension</key>
				<array>
					<string>png</string>
				</array>
				<key>public.mime-type</key>
				<array>
					<string>image/png</string>
				</array>
			</dict>
		</dict>
		<dict>
			<key>UTTypeConformsTo</key>
			<array>
				<string>public.jpeg</string>
			</array>
			<key>UTTypeDescription</key>
			<string>JPEG</string>
			<key>UTTypeIcons</key>
			<dict/>
			<key>UTTypeIdentifier</key>
			<string>public.jpeg</string>
			<key>UTTypeTagSpecification</key>
			<dict>
				<key>public.filename-extension</key>
				<array>
					<string>jpeg</string>
				</array>
				<key>public.mime-type</key>
				<array>
					<string>image/jpeg</string>
				</array>
			</dict>
		</dict>
	</array>
</dict>
</plist>
ビルド
先ほど作った三つの .swift ファイルと Bar アプリケーションバンドルを同じディレクトリに置きます。ターミナルを起動して、そのディレクトリに移動して次のようにコマンドしてください。
// ビルド
swiftc BarApp.swift BarDoc.swift BarView.swift -o bar
// ビルドされた実行ファイルをアプリケーションバンドルの MacOS ディレクトリに移動
mv bar Bar.app/Contents/MacOS