Laravel | Ledger | Create の実装
ホーム
Todo チュートリアル
BBS チュートリアル
Ledger チュートリアル
Cart チュートリアル
サーバーの構築
概要
WEB アプリケーションには、CRUD という機能をつけると良いとされています。
CRUD とは、Create (作成)、Read (読み込み)、Update (更新)、Delete (削除)の頭文字をとったものです。
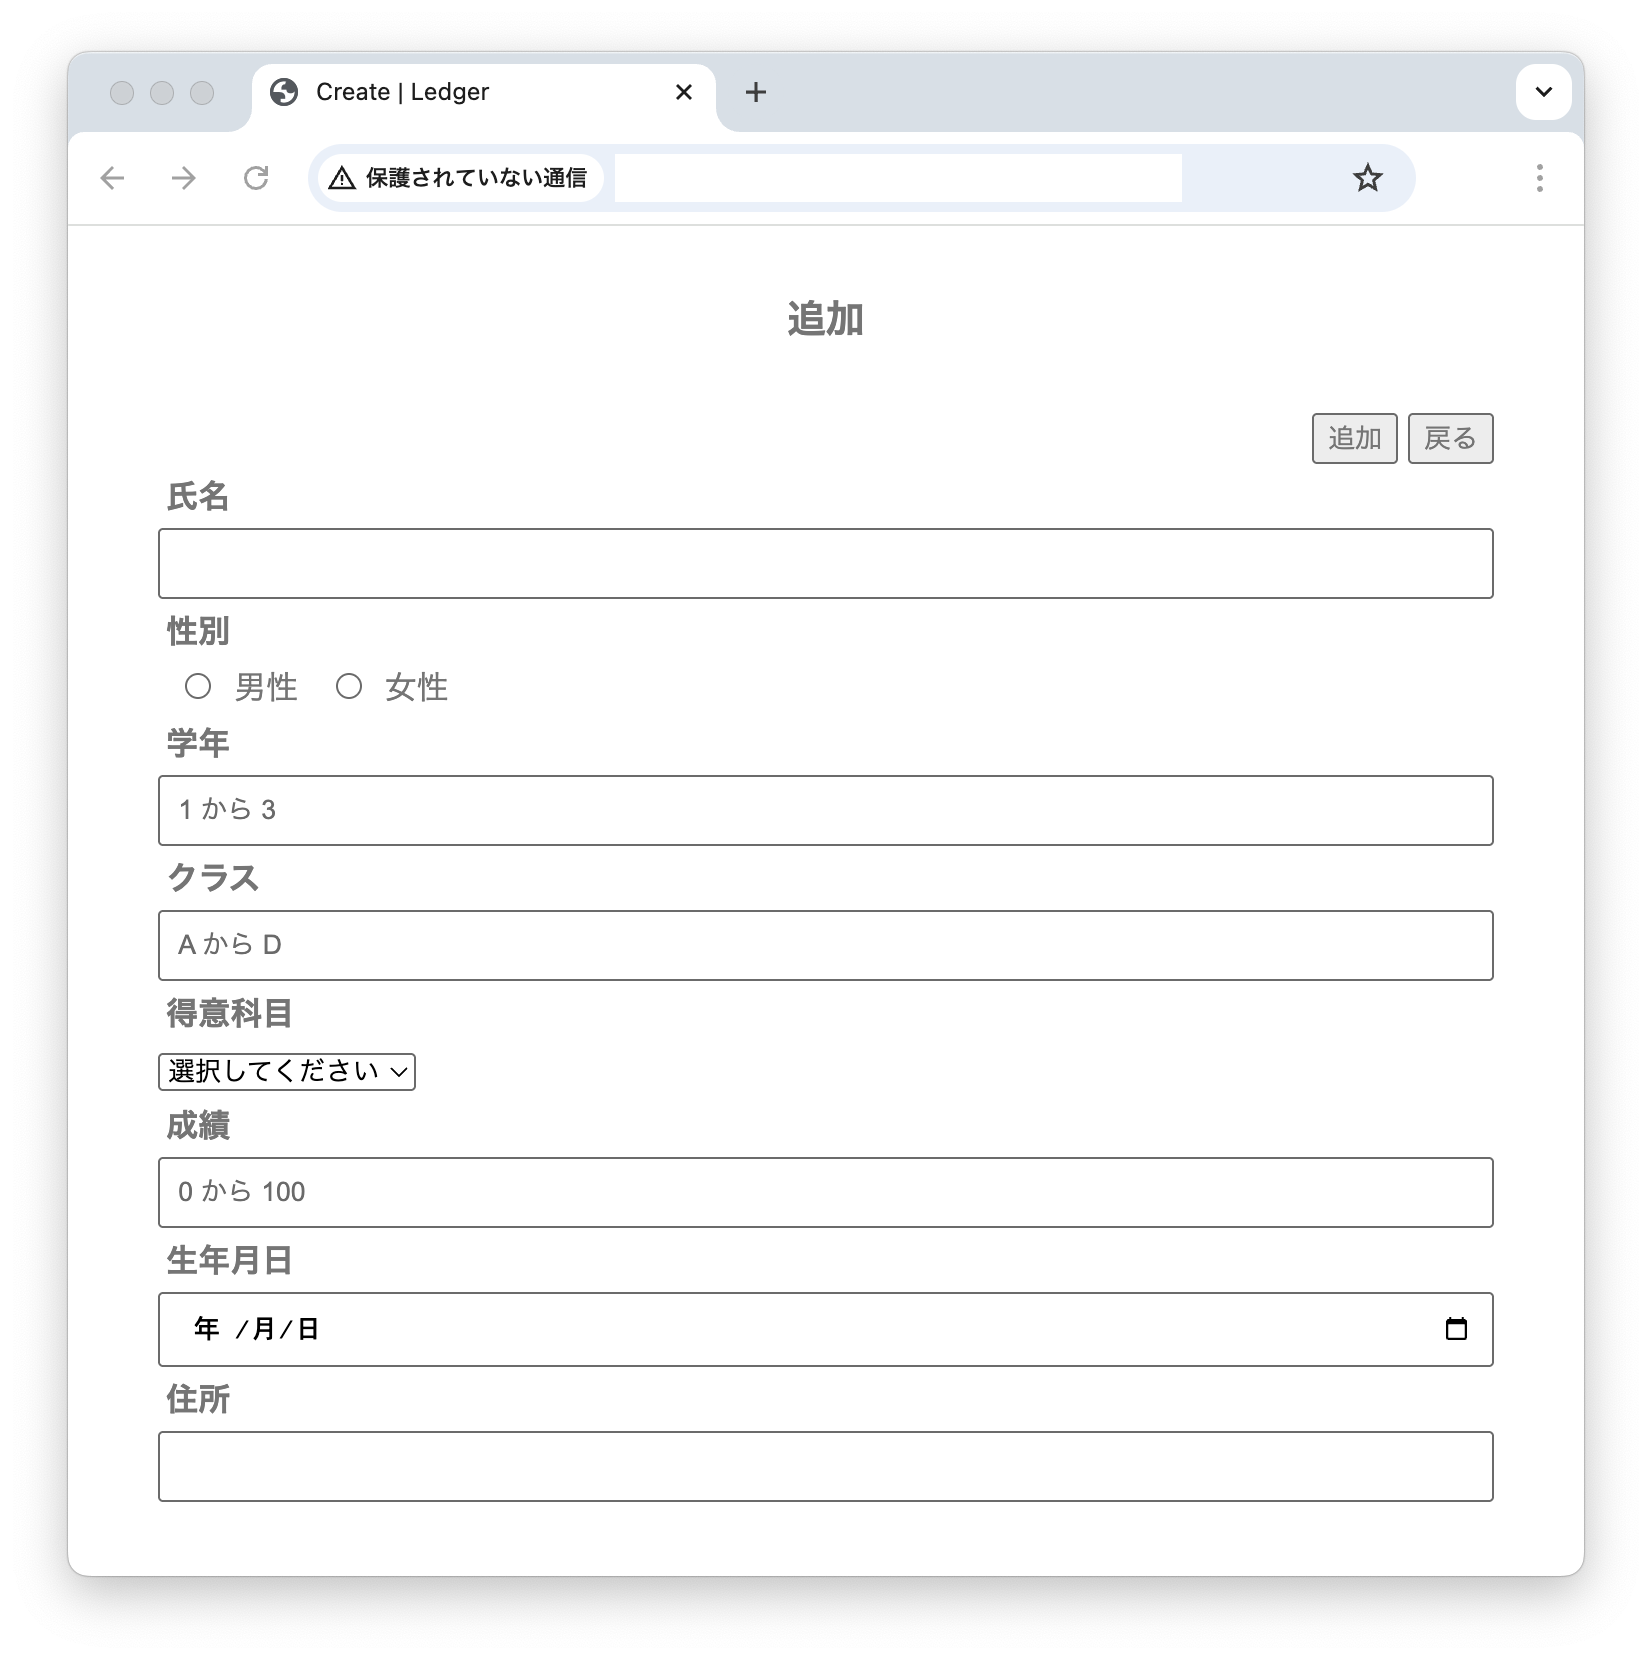
今回は、Create (作成) のページを作ります。
Create ページの作成
resource / views / n_l_s の中に「create.blade.php」というファイルを作ってください。
そして「create.blade.php」を次のように記述してください。
{{----------------------------
create.blade.php
copyright    : vivacocoa.jp
last modified: Aug. 04, 2025
------------------------------}}
<!DOCTYPE html>
<html lang="ja">
<head>
    <meta charset="UTF-8">
    <meta name="viewport" content="width=device-width, initial-scale=1.0">
    <link rel="stylesheet" href="{{url('style.css')}}">
    <title>Create | Ledger</title>
</head>
<body>
<h1>追加</h1>
<div id="container">
<form method="POST" action="{{route('n_l_s.store')}}">
    @csrf
    <div class="a-right">
        <button type="submit">追加</button>
        <a href="{{route('n_l_s.index')}}"><button type="button">戻る</button></a>
    </div>

    <div>
        <label>氏名</label>
        <input type="string" name="name" value="{{old('name')}}">
        @error('name')<p class="error">{{ $message }}</p>@enderror
    </div>
    <div>
        <label>性別</label>
        <input class="radio-btn" type="radio" name="gender" value="1" {{old('gender') == "1" ? 'checked' : ''}}>男性
        <input class="radio-btn" type="radio" name="gender" value="0" {{old('gender') == "0" ? 'checked' : ''}}>女性
        @error('gender')<p class="error">{{ $message }}</p>@enderror
    </div>
    <div>
        <label>学年</label>
        <input type="number" name="year" value="{{old('year')}}" min="1" max="3" placeholder="1 から 3 まで">
        @error('year')<p class="error">{{ $message }}</p>@enderror
    </div>
    <div>
        <label for="product-name">クラス</label>
        <input type="string" name="cls" value="{{old('cls')}}" pattern="[A-D]" maxlength="1" placeholder="A から D まで">
        @error('cls')<p class="error">{{ $message }}</p>@enderror
    </div>
    <div>
        <label for="product-name">得意科目</label>
        <select name="favo">
            <option value="">選択してください</option>
            <option value="国語" @if('国語'==old('favo')) selected @endif>国語</option>
            <option value="英語" @if('英語'==old('favo')) selected @endif>英語</option>
            <option value="数学" @if('数学'==old('favo')) selected @endif>数学</option>
            <option value="理科" @if('理科'==old('favo')) selected @endif>理科</option>
            <option value="社会" @if('社会'==old('favo')) selected @endif>社会</option>
            <option value="体育" @if('体育'==old('favo')) selected @endif>体育</option>
            <option value="音楽" @if('音楽'==old('favo')) selected @endif>音楽</option>
            <option value="美術" @if('美術'==old('favo')) selected @endif>美術</option>
        </select>
        @error('favo')<p class="error">{{ $message }}</p>@enderror
    </div>
    <div>
        <label>成績</label>
        <input type="number" name="grades" value="{{old('grades')}}" min="0" max="100" placeholder="0 から 100 まで">
        @error('grades')<p class="error">{{ $message }}</p>@enderror
    </div>
    <div>
        <label>生年月日</label>
        <input type="date" name="birth" value="{{old('birth')}}">
        @error('birth')<p class="error">{{ $message }}</p>@enderror
    </div>
    <div>
        <label>住所</label>
        <input type="text" name="addr" value="{{old('addr')}}">
        @error('addr')<p class="error">{{ $message }}</p>@enderror
    </div>
</form>
</div>
</body>
</html>
コントローラーの変更
App / Http / Controllers の NLController を次のように変更します。
<?php

/**********************************
 * NLController.php
 * copyright     : vivacocoa.jp
 * last modified : Aug. 04, 2025
 *********************************/

namespace App\Http\Controllers;

use Illuminate\Http\Request;
use App\Models\NL;

class NLController extends Controller
{
    public function index()
    {
        $n_l_s = NL::all();
        return view('index')->with(['n_l_s'=>$n_l_s]);
    }

    public function show(NL $n_l_)
    {
        return view('n_l_s.show')->with(['n_l_' => $n_l_]);
    }

    // ここから
    public function create()
    {
        return view('n_l_s.create');
    }

    public function store(Request $request)
    {
        $request->validate([
            'name' => 'required',
            'birth' => 'required',
            'gender' => 'required',
            'year' => 'required',
            'cls' => 'required',
            'favo' => 'required',
            'grades' => 'required',
            'addr' => 'required',
        ]);

        $n_l_ = new NL();
        $n_l_->fill($request->all());
        $n_l_->save();

        return redirect()->route('n_l_s.show', $n_l_);
    }
    // ここまで追加します。
}
インデックスページの変更
resources / views / index.blade.php を次のように書きかえてください。
{{----------------------------
index.blade.php
copyright    : vivacocoa.jp
last modified: Aug. 04, 2025
------------------------------}}
<!DOCTYPE html>
<html lang="ja">
<head>
    <meta charset="UTF-8">
    <meta name="viewport" content="width=device-width, initial-scale=1.0">
    <link rel="stylesheet" href="{{url('style.css')}}">
    <title>Ledger</title>
</head>
<body>
    <h1>生徒台帳</h1>
    <div id="container">
    <div class="a-right">
        <!-- ここから -->
        <a href="{{route('n_l_s.create')}}">
        <button type="button">追加</button>
        </a>
        <!-- ここまで変更 -->
    </div>
    <table id="table-fixed">
    <tr>
        <th>氏名</th>
        <th>性別</th>
        <th>学年</th>
        <th>得意科目</th>
        <th>成績</th>
    </tr>
    @foreach ($n_l_s as $n_l_)
    <tr>
        <td>{{$n_l_->name}}</td>
        <td>
        @if($n_l_->gender)
        男性
        @else
        女性
        @endif
        </td>
        <td>{{$n_l_->year}}年</td>
        <td>{{$n_l_->favo}}</td>
        <td class="spc">
            <div>
            {{$n_l_->grades}}点
            </div>
            <div>
            <a href="{{route('n_l_s.show', $n_l_)}}">
            <button type="button">詳細</button>
            </a>
            </div>
        </td>
    </tr>
    @endforeach
    </table>
    </div>
</body>
</html>
CSS ファイルの変更
public の中にある style.css を次のように変更してください。
/*****************************
style.css
copyright    : vivacocoa.jp
last modified: Aug. 04, 2025
******************************/
body {
    /* font-family: sans-serif; */
    color: gray;
}

h1 {
    margin: 32px;
    font-size: larger;
    text-align: center;
}

#container {
    width: 90%;
    margin: 0 auto;
}

.a-right {
    text-align: right;
}

button {
    color: gray;
}

table {
    width: 100%;
    border-collapse: collapse;
    margin-top: 32px;
}

#table-fixed {
    table-layout: fixed;
}

th {
    background-color: #dfdfdf;
    border: 1px solid;
    padding: 8px;
}

td {
    border: 1px solid;
    padding: 8px;
}

.spc {
    display: flex;
    border-top: 0;
    border-left: 0;
}

.spc>div:nth-child(1) {
    width: 50%;
    text-align: left;
}

.spc>div:nth-child(2) {
    width: 50%;
    text-align: right;
}

/* ここから */
label {
    font-weight: bold;
    text-align: left;
    padding: 4px;
    display: block;
    width: 100%;
}

input {
    width: 100%;
    padding: 8px;
    /* margin-bottom: 8px; */
    box-sizing: border-box;
}

.error {
    font-size: small;
    color: red;
}

.radio-btn {
    width: 30px;
}
/* ここまで追加 */
php artisan serve で Ledger アプリを起動して、localhost:8000 で確認してください。
Index ページで「追加」ボタンをクリックすると追加ページが表示されます。 追加ページで「戻る」ボタンをクリックすると Index ページに戻ります。 追加ページで、すべての項目に入力して「追加」ボタンをクリックすると、データが登録されて「詳細」ページが表示されます。 詳細ページで「戻る」ボタンをクリックすると、Index ページに戻ります。
追加ページでは、すべて項目に入力しないと、データを追加できません。これは変更することができますが、 その方法は、また別の機会に説明します。
20235 visits
Posted: Aug. 04, 2025
Update: Aug. 04, 2025